Today, we are going to learn how to create a Linux virtual machine in Azure portal. We are going create Linux virtual machine through Azure portal. The Azure portal is a browser-based user interface to create VMs and their associated resources.
I am going to provision the Ubuntu 16.04 server VM in Microsoft azure. If you are not familiar with creating a Linux VM in Azure then follow the below guide lines
How to create a Linux Virtual Machine in Azure?
Using the Azure Portal (http://portal.azure.com), In the Azure world, the services are called ‘Resource’.
- Click the Green ‘+’ sign to start creating a Resource.
- Select Compute under Get Started list
- Select Instance of your choice, here we are using Ubuntu Server 18.04
- Click OK

Now, New Navigation will be open, we have to submit the VM details one by one, lets follow the below process.
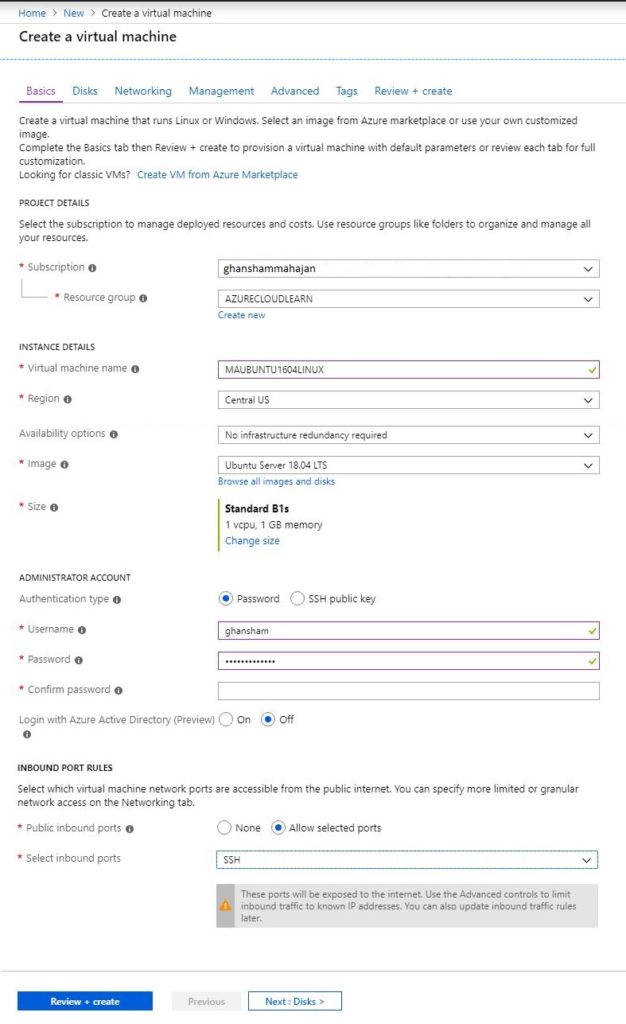
How to create an Azure Resource Group?
- Select the Resource Group
- Enter VM name (VM Name for Linux is in between 1 to 64 character long.

- Select Availability Zone (if required)
- Choose a VM size (depends on your requirements), In this post, we are going with very basic B1s size
- Enter Username that would be your root user
- Select Authentication type SSH public key or Password. In this post, we using password. (Password must follow 3 settings. Ref. Screenshot.)

- Expand Select public inbound ports and choose SSH, this will allow connections on these ports on this VM
- Click Next : Disks >
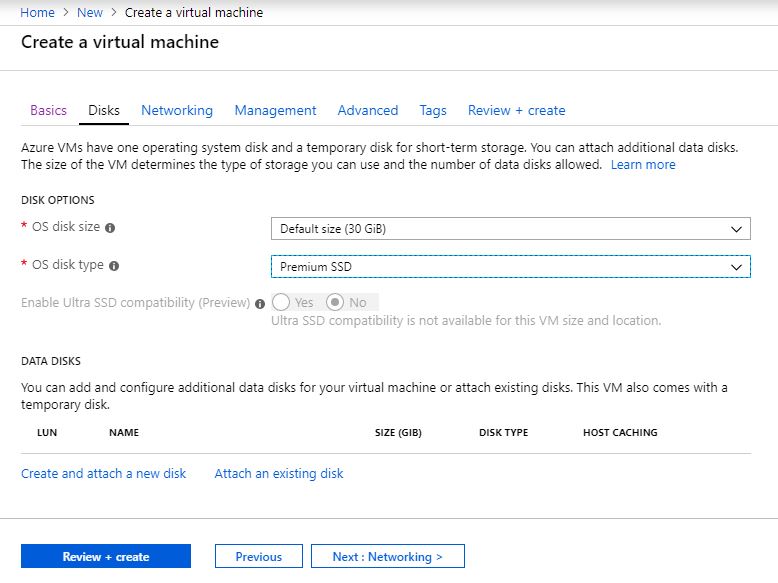
- Select OS disk size and type
- If you want to add data disk then select the “Create and attach a new disk”.
- Click Next : Networking >
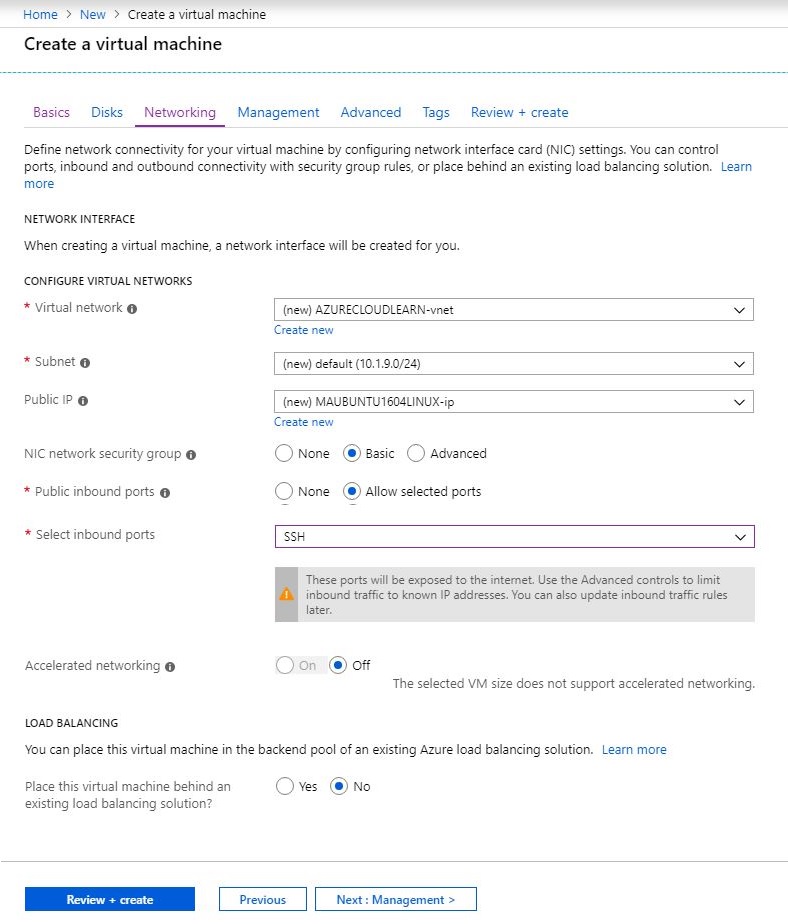
- Select the Virtual Network, Subnet, NIC Network Security Group, we are using defaults for Network and Subnet settings
- Expand Select public inbound ports and choose SSH and HTTP, this will allow connections on these ports on this VM
- Select Load Balancing (if required)
- Click Next : Management >
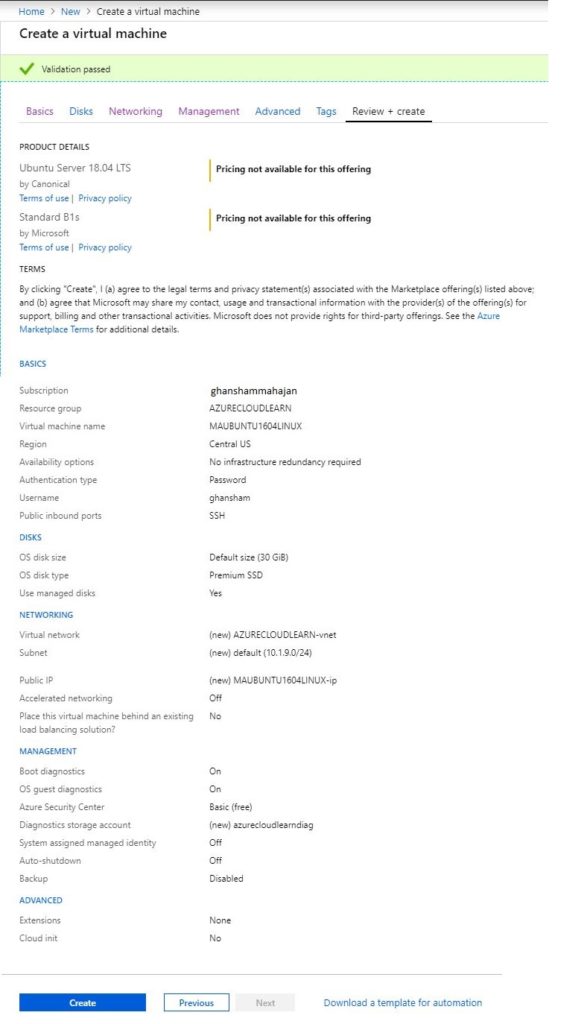
- Select Boot Diagnostics and OS guest Diagnostics in MONITORING section
- we are using defaults for IDENTITY AUDO-SHUTDOWN and BACKUP settings
- Click Review + create

- Review Summary and click Create
Verify Resources
- Click Virtual Machines in the left panel
- Hit Refresh to see your new VM appears in the list
- Status showing Running

Hopefully, this will helps your understanding 🙂 Click Me for more post for Azure
Pingback: no prescription cialis
Pingback: ciprofloxacin price without insurance
Pingback: albuterol inhaler
Pingback: sildenafil for sale
Pingback: naltrexone tablets brand india
Pingback: chloroquine tablet price
Pingback: buy hydroxychloroquine
Pingback: cheapest generic viagra online
Pingback: buy cialis
Pingback: pfizer viagra 50mg
Pingback: cheap cialis