Installation of RHEL 8 with Screenshots
Red Hat has released its most awaited OS RHEL 8 on 7th May 2019. RHEL 8 is based on Fedora 28 distribution and Linux kernel version 4.18. We have see the Red Hat Enterprise Linux 8 (RHEL 8) Released and New Features in previous article. In this article, we learn Installation of RHEL 8 with Screenshots.
Red Hat Enterprise Linux 8 (RHEL 8) Release and New Features
1. Boot the RHEL 8 installer
Boot your system using the bootable installation media containing the RHEL 8 Binary DVD .iso:
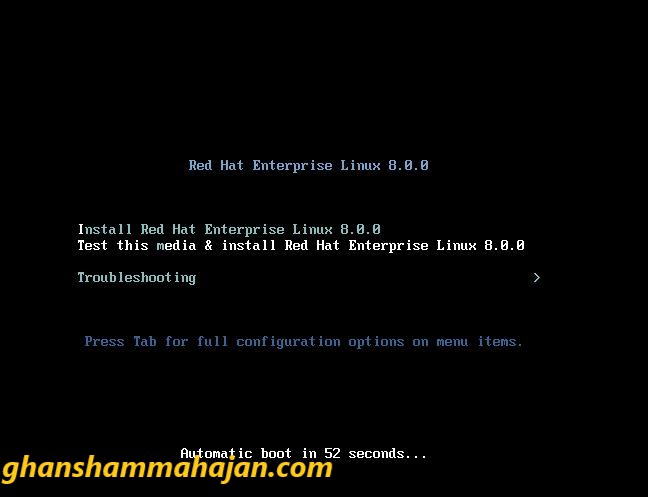
Select the “Install Red Hat Enterprise Linux 8.0.0” using Up-Down Arrow Keys
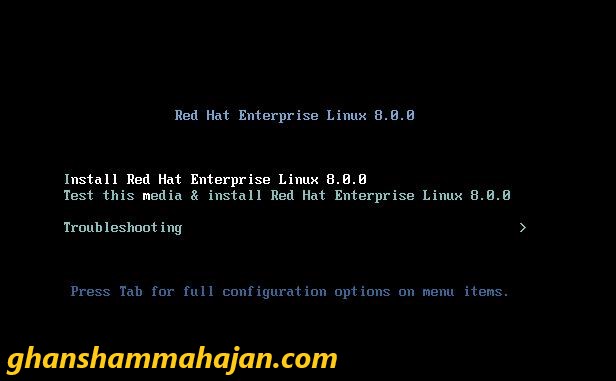
Note: During boot, you can skip the media checking step by hitting the Esc key
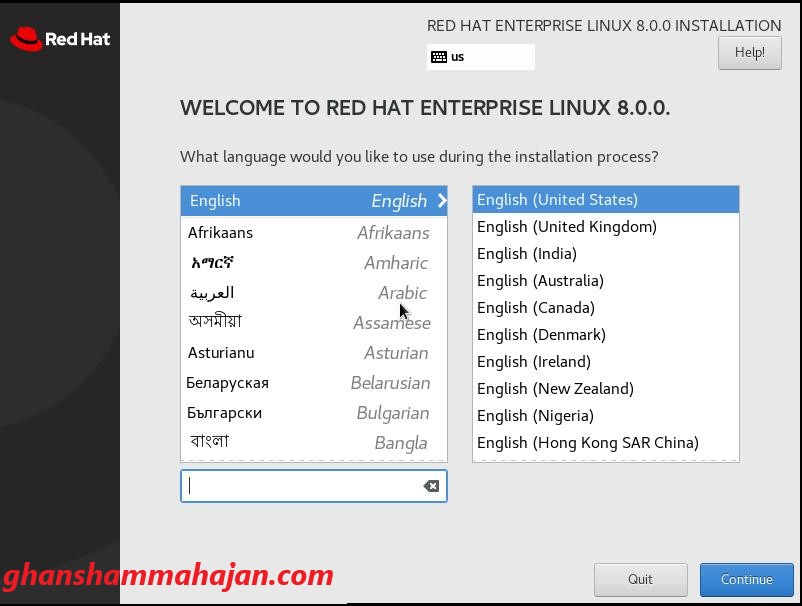
On the following screens, select your preferred language and keyboard layout to use during installation.
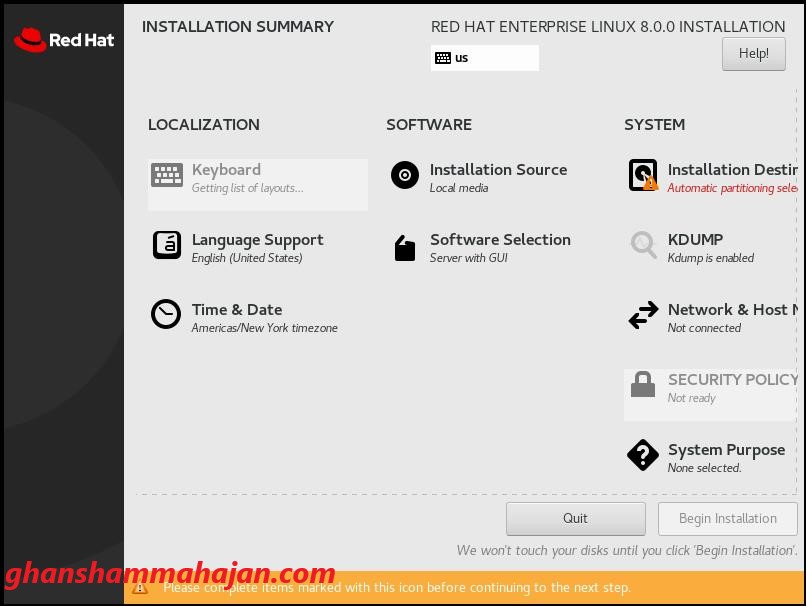
You should now see the main screen for configuring your installation:
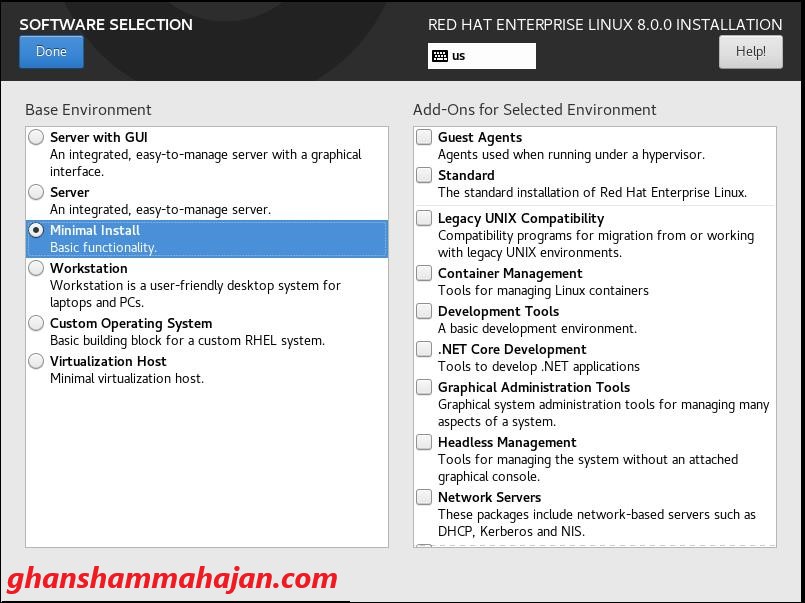
2. Select software to be installed
Click Software Selection under SOFTWARE. We recommend that you:
- Choose Workstation on the left under Base Environment
- Then, choose Container Management, Development Tools, and Graphical Admin Tools.
Note: Do not choose Server with a GUI as your base environment. There is a known issue that will prevent the graphical desktop from starting
We are selecting the Minimal base environment as demo purpose.
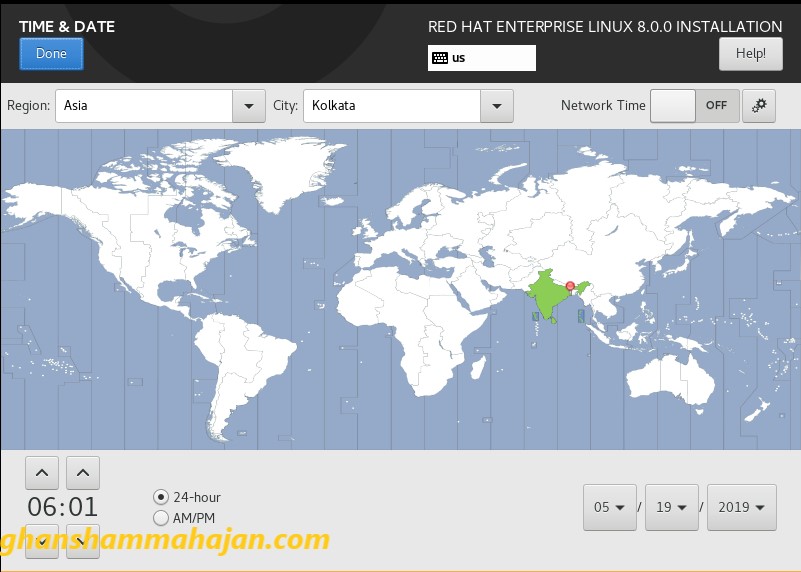
Set up the Time and date setting as per your geo location.
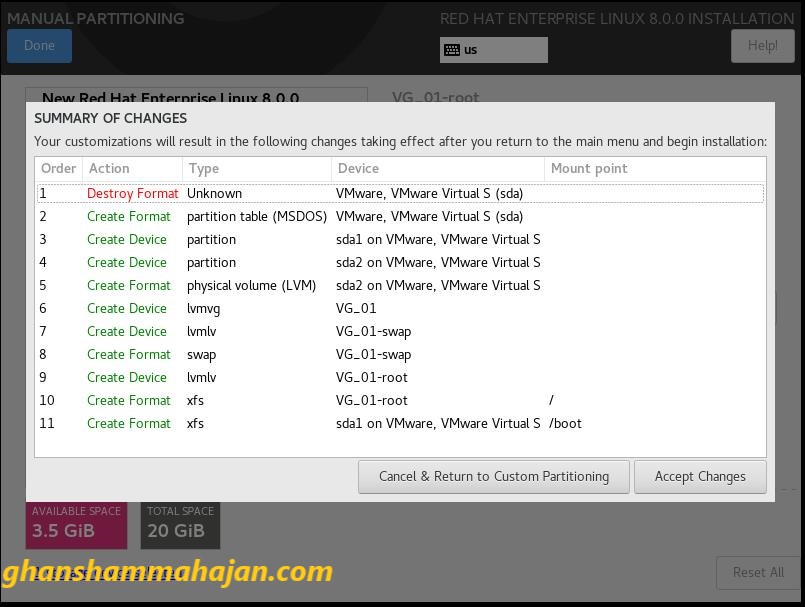
3. Choose disks/partitions for installation
Click Installation Destination under SYSTEM. Choose the disks/partitions to use for installing RHEL.
Note: if your system only has one disk and you are using the whole disk for the installation, just click Done

I am using LVM for disk partition.
/boot is 500 MB standard partition
/ is 15 GB LVM partition
Swap space is LVM partition
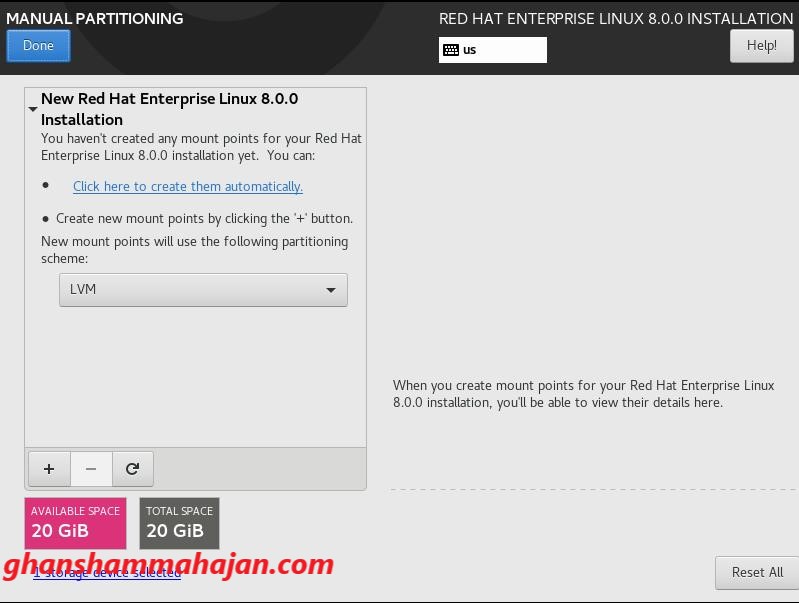

Apply the changes to format the disk and enable to partition
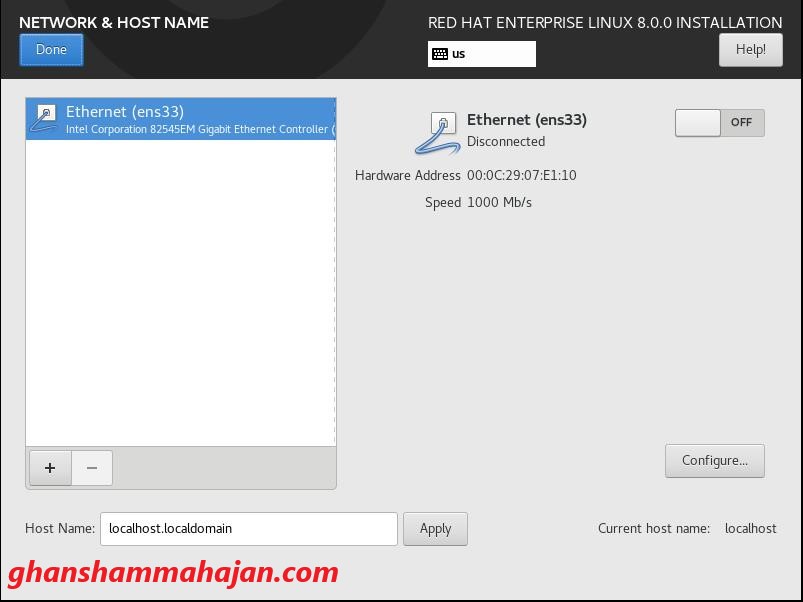
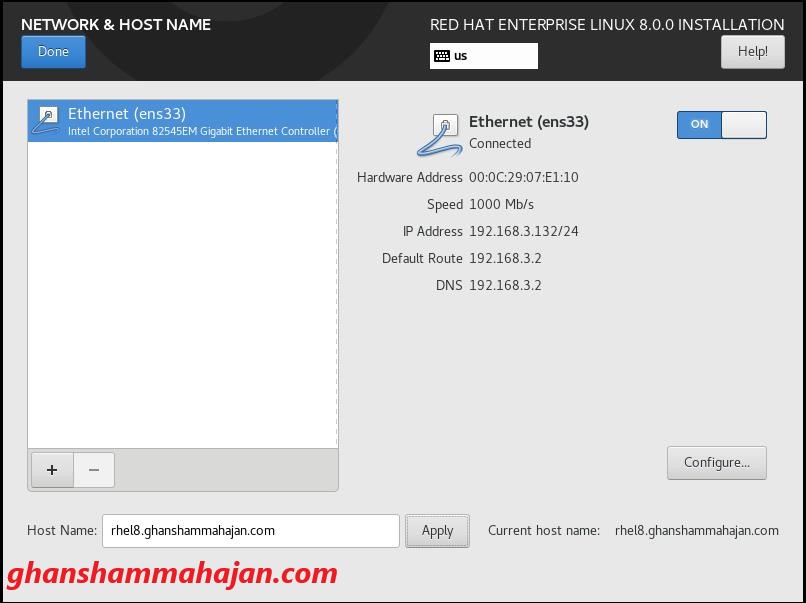
4. Configure and enable the network connection
Next, configure the Network and optionally set the host name. Click Network & Host Name under SYSTEM. Then:
- Select your network adapter from the list. if you need to change any network settings click Configure… .
- Turn the adapter on by clicking the toggle to the right of the OFF button in the upper right corner.
- Optionally, you can set the system’s host name on the lower left.
Note: If you do not enable the network adapter here, you will not have network connectivity when you boot the system.
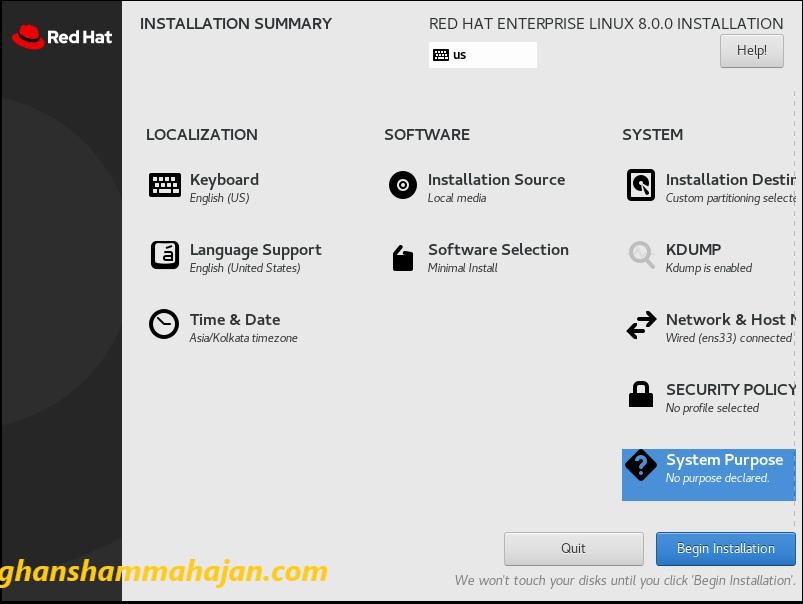
5. Begin the installation
When you are satisfied with your configuration, click Begin Installation.
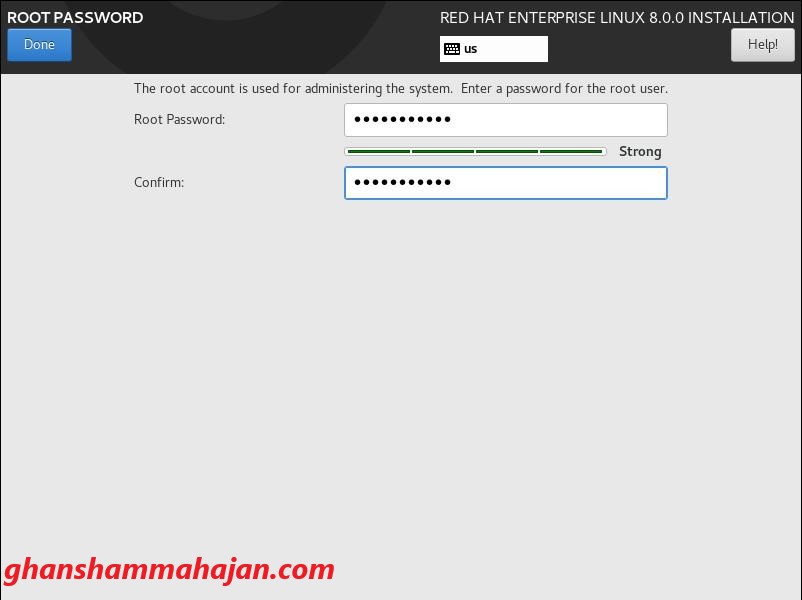
6. Create your user ID and set the root password,
While the installation is proceeding, click Root Password to set the root (Administrator) password.
Next, create the regular user ID that you will use to log into the system by clicking User Creation.
Important
note: Select Make this user administrator. This will enable sudo for your user
ID.

7. Reboot and eject installation media
When installation is complete, click Reboot in the lower right corner.
Important note: While your system is rebooting, don’t forget to eject the installation media so that you don’t inadvertently reboot into the RHEL 8 installer again
If you have a machine (or VM) that reboots too quickly to eject the installation media, you can try:
- Change the boot order in the BIOS
- Shutdown the system and then restart the system to. Eject the media during POST, or use the appropriate key for your BIOS (such F12, F10, Enter) to select a boot device.
- On VirtualBox, select Devices from the VM’s window menu, then select Optical Drives -> Remove disc from virtual drive to eject the installation ISO. If the system has already booted into the installer, you will need to click Force Unmount. Then reset the VM, either through the Machine menu, or using the keyboard shortcut Right CTRL + R (Windows/Linux) or Left Command + R (Mac). The VM should then boot from the virtual hard disk.
- On Hyper-V, select Media from the VM’s menu. Then select Eject for the RHEL 8 DVD.

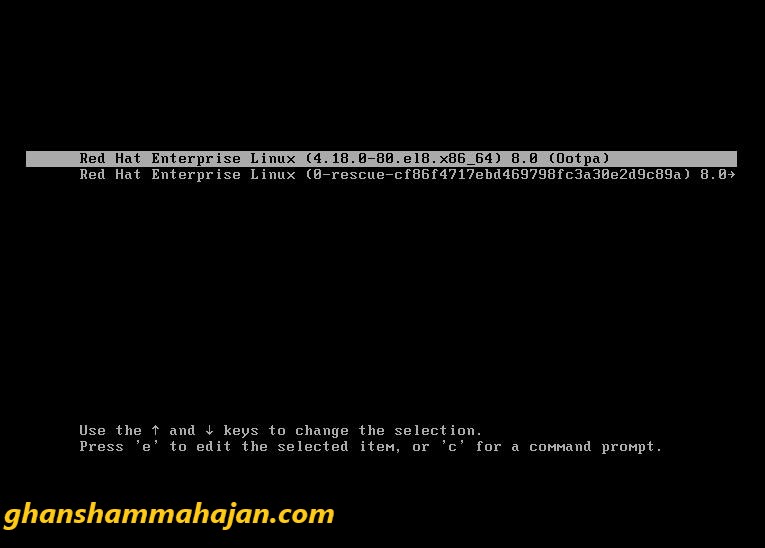
System restarting and showing the Grub menu.
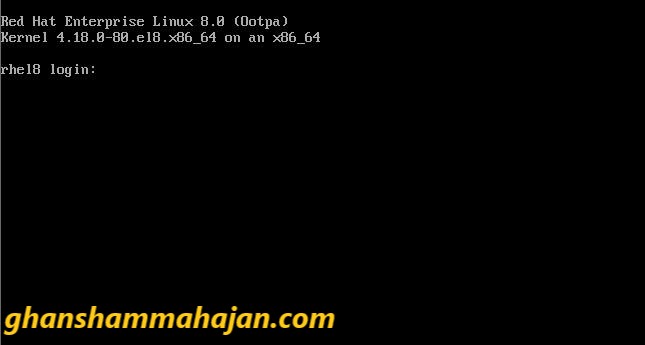
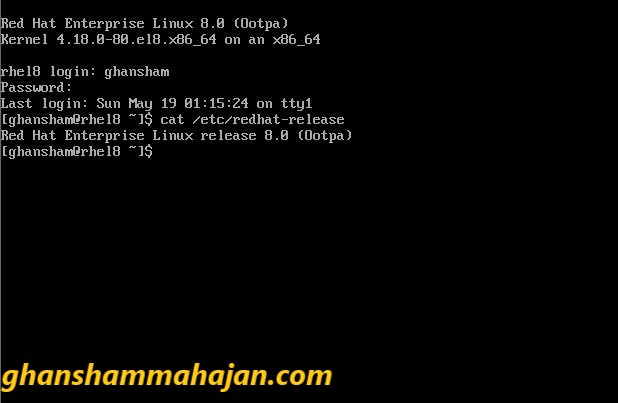
Log into the system with the user ID and password you created during installation.
Hopefully “Installation of RHEL 8 with Screenshots”, this will helps your understanding. 🙂